




















Bulk email verification.
Better contact data.
Verify a single email or a bulk list.
Keep verified contacts organized and build better contact data in one place.
Ask AI about EmailAwesome


© 2026 EmailAwesome. All rights reserved.


To organize verified email contacts into lists, start with the records in Contacts, find the people relevant to your project, and group them in a clearly named list. In EmailAwesome, a contact can belong to several lists. This lets you organize the same record for different projects without treating each list as a different person.
A useful list answers a specific question: which contacts belong to this project, and what should the team review next? List membership is an organizational choice. It does not change a verification result, establish permission to send, or keep an address valid indefinitely.
Complete the address check first. You can verify a single email or upload a CSV through Email Verification. Review the completed results rather than assuming that every uploaded row becomes a usable contact. Valid addresses verified through the current flow are saved to Contacts. A newly verified address may take a short time to appear; check the completed verification result and allow time for Contacts to update.
If you are still preparing a file or reconciling its results, follow the CSV verification workflow first. This guide covers the next step: finding and organizing records that are already in Contacts.
Open Contacts in the EmailAwesome app. Search by email or name, then use the source and status filters to narrow the records you need to review. Start from All Contacts when you want to look beyond one existing list.
Search and lists serve different purposes. A search helps you locate records now; a named list gives a group a purpose you can recognize later. Do not assume that a search result automatically creates or maintains a list.
Before grouping records, check that the email and available details match the intended contact. Similar names are not enough to establish that two records belong to the same person.
Use the plus control beside Lists to open Create a new list. Enter a List name and, where helpful, an optional Description. The dialog describes lists as manual groups and confirms that a contact can belong to several lists.
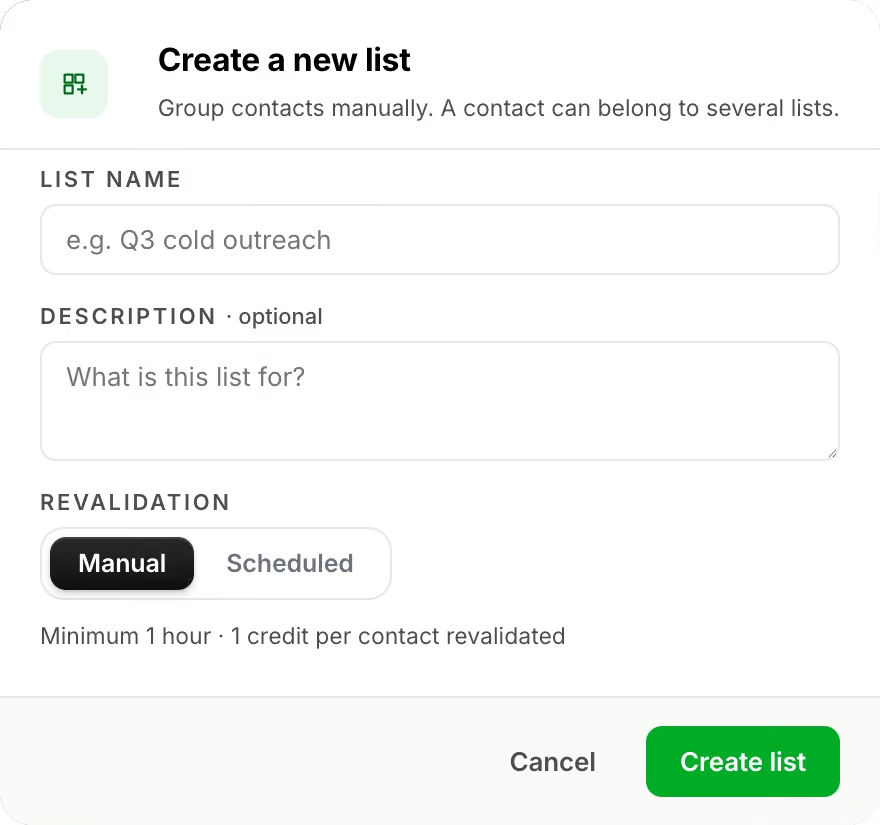
Choose a name that explains the project rather than making a promise about the contacts. For example, November partner follow-up is clearer than Good emails. Use the description to state who belongs in the group and what the team should review before the next action.
Review the revalidation settings separately before confirming Create list. Organizing records and checking addresses again are different operations. If you choose a revalidation option, review the settings and credit information displayed in your account before enabling it.
Review the contents after making changes: the right list name does not establish that every record belongs there.
A contact may be relevant to more than one project. For example, the same partner could belong to both a November follow-up list and a product-feedback list. Those memberships describe two purposes; they do not represent two independent verification results or two permissions to send.
Keep list names and descriptions consistent enough for another team member to understand them. Avoid mixing different clients or projects into a generic list whose contents are hard to explain.
Before using the group for a handoff or follow-up, review four things:
Decide when to check addresses again using the age of the result, changes to the record and the planned use. The email re-verification guide explains how to make that decision without assuming that every list needs the same schedule.
Return to All Contacts and review any active search or filters. Search for the exact email where possible. If the record came from a recent verification, check the completed result in the verification flow before assuming that it should appear in Contacts.
Contacts organizes verified records; it is not a supplied prospect database, an email sending platform or a complete historical audit log. Keep the source file and any operational history your team needs separately.
Open Contacts to review your records and create a list for one clear project. Start with a manageable group, give it a meaningful name, and verify that its contents match its purpose.
Check the most Frequently Asked Questions
What is Contacts?
Can I export from Contacts?
Bulk email verification.
Better contact data.
Verify a single email or a bulk list.
Keep verified contacts organized and build better contact data in one place.
Ask AI about EmailAwesome